The recent changes to Interface Builder made me change my mind about it. I was sold on the Preview feature which allows to test the UI on different screen sizes and in different orientations. Let’s see how to make the best use of this feature.
Using Interface Builder #
There are two major things that you can do in Interface Builder to get your job done: layout and styles.
Layout #
IB is great at defining the layout. It allows you to add constraints surprisingly quickly. You can (arguably) do it even faster than if you were using DSLs on top of Auto Layout like PureLayout or Carthography. I used to be a huge proponent of those tools but now I tend to rely less and less on them.
The best thing about working with constraints in IB is that it allows you to get instant feedback about any problems you might have with the constraints that you’ve defined. You can iterate very quickly without ever running or even compiling an app.
Styles #
Defining styles is a different thing. The cons of defining styles in IB are:
- You can’t use predefined styles shared throughout the app
- You can’t take advantage of the tools that auto-generate styles for you (e.g. Zeplin)
- It’s tedious to work with styles in the GUI
- If you start changing any of the views’ properties in IB you end up with two places to look when you want to know their final values: both IB and code.
The pro of defining styles in IB is that you can visually see what the UI is going to look like without running an app. This is one the major reasons which make IB so appealing to me. But if we are not going to define any styles in IB how are we to actually achieve that? Fortunately, there is a very straightforward way to do that and it involves one of my favorite IB features which is @IBDesignable.
@IBDesignable #
@IBDesignable enables live rendering of the custom views in Interface Builder. In order to enable live rendering of the entire View Controller UI we need to make its entire view @IBDesignable. Simple as that.
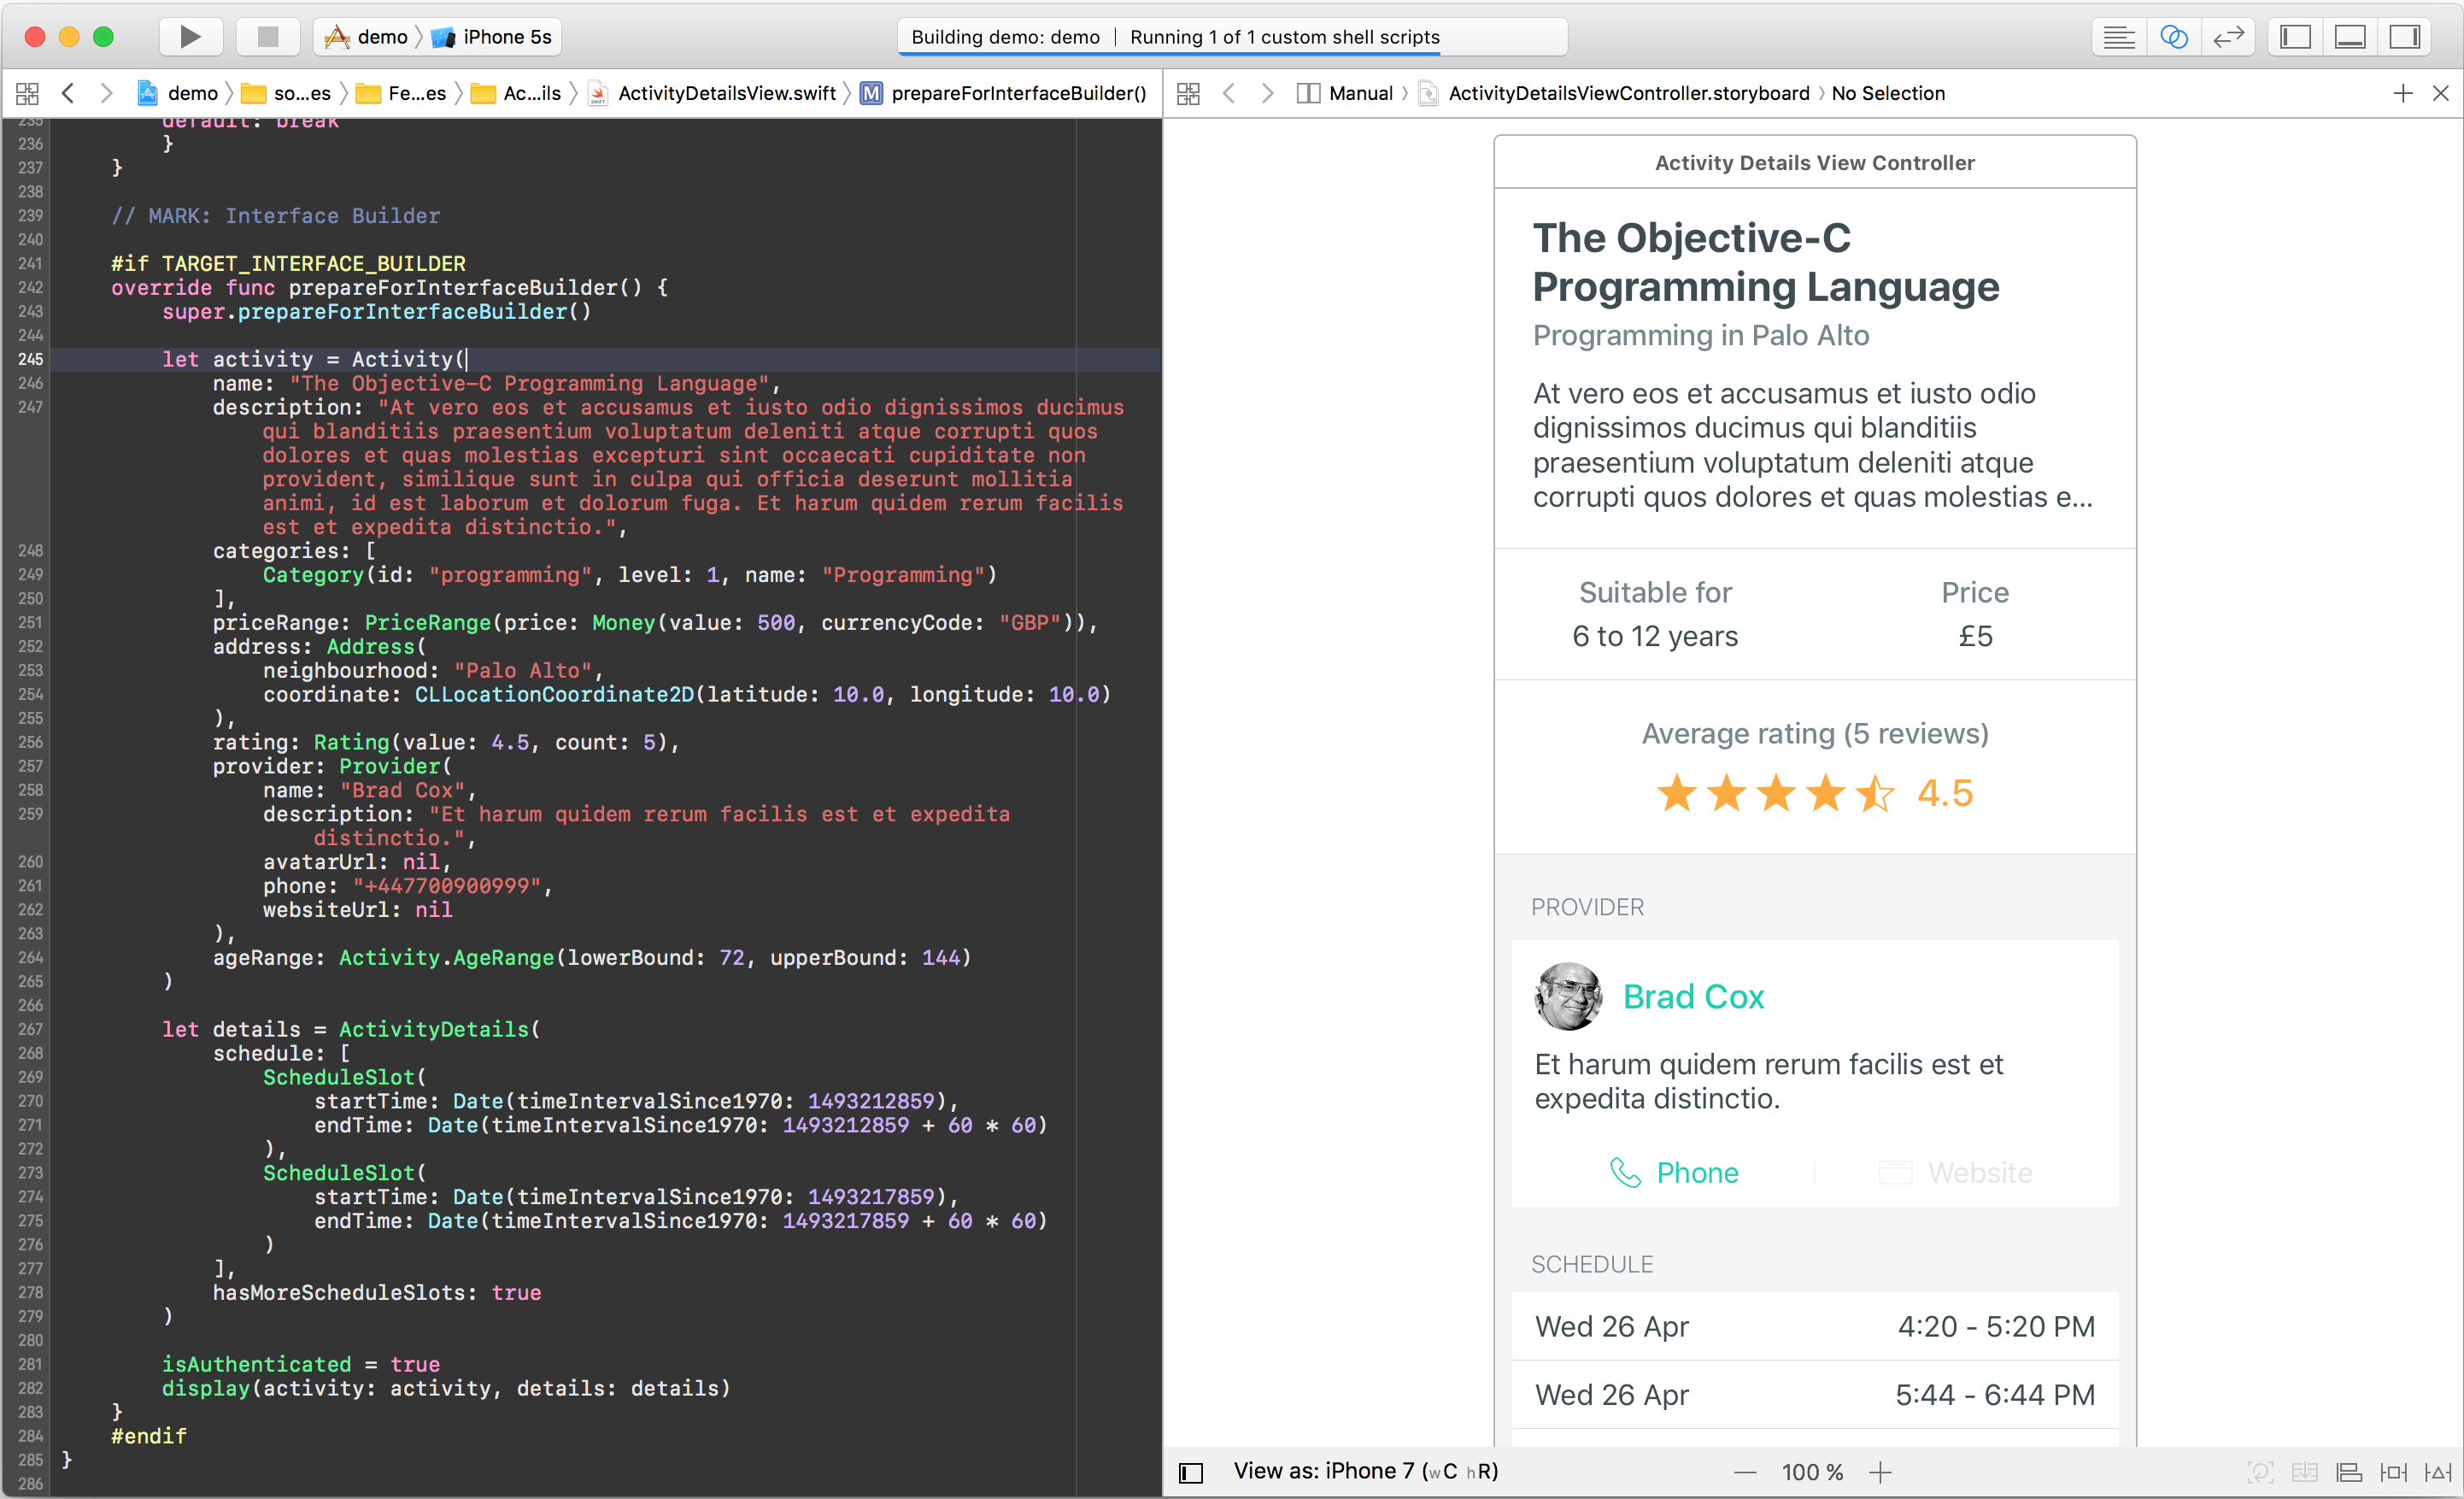
The example in the screenshot in the begging of the article is rendered entirely by an ActivityDetailsView class. This view contains a table view and implements its data source to render the Activity model objects. Here’s a part of the implementation of the ActivityDetailsView.swift file to get an idea how it might look like:
// @IBDesignable final class ActivityDetailsView: UIView, UITableViewDataSource, UITableViewDelegate {

@IBOutlet private weak var tableView: UITableView!

required init?(coder aDecoder: NSCoder) {
    super.init(coder: aDecoder)
    commonInit()
}

override init(frame: CGRect) {
    super.init(frame: frame)
    commonInit()
}

private func commonInit() {
    ext_addNib() // Loads and adds nib to the view

    registerCells(tableView)
    tableView.dataSource = self
    tableView.delegate = self
    tableView.rowHeight = UITableViewAutomaticDimension
}

// MARK: Table Data

private var tableData: TableData<TableItem> = .empty
private var activity: Activity!

func display(_ activity: Activity) {
    self.activity = activity
    tableData = ActivityDetailsView.makeTableData(activity: activity)
    tableView.reloadData()
}

// This method that can be easily covered by unit tests.
static func makeTableData(activity: Activity) -> TableData<ActivityDetailsView.TableItem> {
    // ...
}

// MARK: UITableViewDataSource

func tableView(_ tableView: UITableView, cellForRowAt indexPath: IndexPath) -> UITableViewCell {
    // ...
}

// MARK: Interface Builder

#if TARGET_INTERFACE_BUILDER
override func prepareForInterfaceBuilder() {
    super.prepareForInterfaceBuilder()

    let formatter = DateFormatter.ext_makeISO8601Formatter()
    let activity = Activity(
        name: "The Objective-C Programming Language",
        description: "At vero eos et accusamus et iusto odio dignissimos ducimus qui blanditiis praesentium voluptatum deleniti atque corrupti quos dolores et quas molestias excepturi sint occaecati cupiditate non provident, similique sunt in culpa qui officia deserunt mollitia animi, id est laborum et dolorum fuga.",
        categories: [
            Category(id: "programming", level: 1, name: "Programming")
        ],
        priceRange: PriceRange(price: Money(value: 5, currencyCode: "GBP")),
        address: Address(neighbourhood: "Palo Alto"),
        rating: Rating(value: 4.5, count: 5),
        provider: Provider(
            name: "Steve Jobs",
            description: "Et harum quidem rerum facilis est et expedita distinctio.",
            avatarUrl: nil,
            phone: "+447700900999",
            websiteUrl: nil
        ),
        ageRange: Activity.AgeRange(lowerBound: 72, upperBound: 144),
        schedule: Schedule(
            slots: [
                Schedule.Slot(
                    startTime: formatter.date(from: "2017-03-29T16:30:00Z")!,
                    endTime: formatter.date(from: "2017-03-29T17:30:00Z")!
                ),
                Schedule.Slot(
                    startTime: formatter.date(from: "2017-03-31T16:00:00Z")!,
                    endTime: formatter.date(from: "2017-03-31T16:30:00Z")!
                )
            ],
            hasMore: true
        )
    )

    // This is a helper function which then creates a ViewModel with a given Model object
    display(activity)
}
#endif
In order to feed the test data into the view the special prepareForInterfaceBuilder method is called:
When Interface Builder instantiates a class with the IB_DESIGNABLE attribute, it calls this method to let the resulting object know that it was created at design time. You can implement this method in your designable classes and use it to configure their design-time appearance. For example, you might use the method to configure a custom text control with a default string. The system does not call this method; only Interface Builder calls it.
The only part that is left is to add this view into the view controller. We can now start testing the entire UI using IB:
Conclusion #
IB is not just a great tool for creating the UI but it is also great for testing it. By doing so you can dramatically reduce the number of times you need to run your app during the development cycle. You can rely on IB to test your layout, styles, and even some of the logic that displays your model objects (however, you should really invest time in unit testing in order to test the correctness of the later).
WARNING
The major issue with
@IBDesignableis just how unstable the Interface Builder (as of Xcode 8.3) seems to be when it is used. You should definitely check if you can tolerate it before committing into this approach.
I hope that Apple will continue improving IB. Imagine how great it would be if Storyboards were interactive in way Playgrounds are (see PlaygroundPage liveView. It would enable developers to do even more things with the UI without ever running their apps (e.g. test animations). In fact some teams actually replaced Interface Builder with Playgrounds.